Sunday, September 29, 2013

They're Flying!

This year I was assigned to teach two sections of Digital Photography 2.  I'd been teaching Photo 1 since my hire 5 years ago, and at this point, could teach it in my sleep.  But I was kind of nervous about teaching Photo 2.

Photo 1 is supposed to be all the basics - how to work your camera, how to control your lighting, how to set up a still life, etc.  It's basically "How to Take a Photo" class.  Photo 2 is much more about using what you know to create meaningful, conceptual works of art.  It's basically "Photography as an Art Form" class...which, with high school kids can be kind of tough.

We're four weeks into shooting, and I'm happy to say I've had a lot of success with the kids- but more than that, we've all had so much fun.

Case in point: last week's Levitation Photography assignment.

What is Levitation Photography?  Google it, and be amazed!

via.

Levitation Photography is basically setting up and editing a shot to make it seem as if a person or object is levitating, or floating in mid air.  It's like magic!  And honestly, it's so easy to do!

Check out some more beautiful examples of levitation photography here.

Here is a very simple tutorial for how to make a person look like they're floating:

 
The sound gets a little weird when he does the photoshop tutorial, but all the basics are there.  He's right- all you need to do the project is a camera, a tripod (or some sturdy surface to rest your camera on while you shoot), your model, and objects for them to sand/lay/rest on.  And yes, you absolutely need two photographs: 1 of the plain background, and 1 of the set-up with your model.

I stressed to my kids that choosing a model who will listen to you, and be a bit expressive was really important.  If you wanted them to look like a floating goddess, they'll have to move their arms and hands and toes just right- you can't be a floating goddess with flat feet and rigid shoulders, you know?

Using the masking tool was one way to edit the photos (as this guy did in the tutorial) however, the only issue with that is, especially outdoors, your light changes from minute to minute.  So if the kids took a lot of time setting up their model, the masking tool would show the change in light very clearly.  What some of my students opted to do was trace and cut their models out with either the pen tool, or the select too (which most of them preferred).

Here's another much more detailed tutorial with tips on doing levitation tricks with objects, and how to adjust small things to make it look super realistic: here. (For some reason, blogger was being cranky and wouldn't let me embed the video.)  But this guy gives some more specific instructions, and his accent is just lovely!

All in all, this was a really fun, and surprisingly quick/simple project to do with my kids.  Some of them took the concepts and really ran with them- we had "ghosts" floating in graveyards and dads floating away with balloons. 

One of the things that made me most happy was how many students returned from a weekend of shooting to say, "My sister/brother/mom/dad/cousin/grandma had so much fun with this project!  I can't wait to show them how they turned out!"  I love a project that gets family and friends involved.  I hope it sparks an interest in photography for them, but also teaches my student that photography is an interactive art- not just a solo one.

So there you have it!  We have a beautiful day upon us (at least we do out here in NJ)- Give some levitation photography a try!


Friday, September 27, 2013

A Case of the Amidones

It's not quite as physically disturbing as the flu, but it's pretty much just as contagious as pink eye.  It rears its head every school year, multiple times a year, but just around this time is when it starts- near the end of our first real project.  Yesterday, we had our first outbreak.

My four Fine Art 1 classes are just about wrapping up their first project- graphite still life, and I must say they've been working like crazy.  Each class comes in and without any prompting, gathers their materials and gets to work.  They've been very open minded and put forth a ton of effort, and just like every other year, I've got a ton of naturally talented kids. 

However, yesterday the Amidones began.

In one of my morning classes a particularly advanced student put the final touches on his project, which I then framed for the front hall.  I gave him some perspective worksheets to practice with while the other studnets finished up, and that was all it took.  The hands started shooting up all over the place.

Amidone?! Amidone? Amidone?

It was like a virus, quickly working its way not only through that class period, but all four of my Fine Art 1 classes.  Once word got out that someone had actually finished the project, all bets were off.  I spent most of my day crushing all the hopes and dreams of each child who eagerly asked, Amidone!? (just like that, in one long word, rushed and panicked.)

I usually do pretty well with the Amidones, but eventually they gang up on me and break me down.  Toward the end of the day I was starting to feel it.  I'm so glad the weekend is upon us so I can rest up and crush those Amidones on Monday.

No, you're not done, and every time you ask me, I'll find something else you need to fix!

Wednesday, September 25, 2013

Creative Ceramics

This fall I'm taking a ceramics graduate class.  I've always loved ceramics, but admittedly, it's not my medium of choice.  I'm not a 3-D thinker by nature, so I always find working in clay a little more challenging.  I understand all the basics- how to work with the clay, different techniques, all that good stuff- I just find that I'm not very creative when it comes to actually designing and making something.

This week was our second meeting and we were given our first assignment- a large-scale tile relief sculpture.  We're working in 6"x6" tiles, about 1/4" thick.  We must do at least 4 tiles, but can go up to as many as 20.  I've decided to do 6.

I spent that second night of class rolling out and cutting all my tiles, and by the time that was done, the class was over. I spent the following week designing my tiles, then in my most recent class, started drawing, cutting and building them up.  This is where I ended last week:


 I've had this underwater animal theme going for the last year or so, so doing an octopus was my first idea.  I just love that animal- so smart, and so weird looking!  I'm really excited about creating all the different, fun textures on the tiles next week.

But I started thinking ahead to future projects my professor mentioned and wanted to get a head-start on gathering information, so of course, I went on Pinterest.  Here are some neat ideas/techniques I hope to try this semester:

1. Alphabet Pasta

via.

Not exactly tile reliefs, but this technique could be used in any ceramic creation.  You just use some alphabet pasta, press the letters into your creation, and when it gets fired, the pasta burns away, leaving you with only the indentations.  How clever!  In the end, they look something like this, depending on how you glaze them:

via.

2. Imperfect Coils

I tried making a coil pot my first week of class.  It ended up just okay.  Thing is I got all neurotic and tried to make all my coils perfect, and of course, that's really hard to do- especially if you haven't done ceramics in, oh, I don't know, five years?  What I should have done was focus more on the process and just let the coils do what they wanted.  I found this student-made coil pot on Pinterest and I'm in love with the imperfections:

via.

3. Lace Texture

I thing textures are a huge part of why I love ceramics as an art form.  I love that you can create your own, or press things into the clay so that it takes on the texture of that object.  Recently, I cleaned out the prop room at school and found two really interesting pieces of lace.  I'd love to try them out like the gorgeous vessels below:

via.

I'm sure I'll be pinning way into the semester.  I'm hoping I can pop out a few extra projects on my own time to really make the most of my use of the studio/kilns at the university.

Any ceramic artists out there with suggestions for a sort-of newbie?

Monday, September 23, 2013

TEACH

It aired a few weeks ago, but CBS had a two-hour special, which followed four teachers from all over the U.S. and documented their trials and triumphs over a year.  It focused on how teachers adapted to their students needs, how students adapted to new technology/classroom procedures, and the ending results of everyone's hard work.

It was one of the best teacher-related documentaries I've seen- so real and inspiring.

If you haven't seen it, watch this promo:

 
Everyone has at least one teacher they can remember as a person who most inspired, pushed, or motivated them to be not only a better student, but a better person.  A person who strives for excellence, and doesn't give up when it gets hard.  

At the end of TEACH, a stuent is asked, "What is a teacher?" 

She responds, "Someone who inspires you to do something better with your life."

Saturday, September 21, 2013

Portland, Bangor, Acadia National Park, and Bar Harbor, Maine

Indy and I spent very last week of this summer in Maine.  Each year we try to save up enough greens for a large trip (this year: Scotland) and a more local trip (Maine).  It was the perfect time to go as school had started up in many of the surrounding areas, so the hot spots weren't as crowded as we had feared. 

I compiled a few neat shots of our trip for your enjoyment!

Portland: We were only in Portland for a full day and night, but we walked around and saw some pretty beautiful things.  We also took a ghost tour (I'll have a post about that soon).


Bangor: We stopped briefly in Bangor to snap a few shots of Mr. Stephen King's house.  So cool!


Acadia National Park: We camped in the park for two nights, and it was gorgeous.  We also hiked up Cadillac Mountain, which is the highest point on Mount Desert Island!


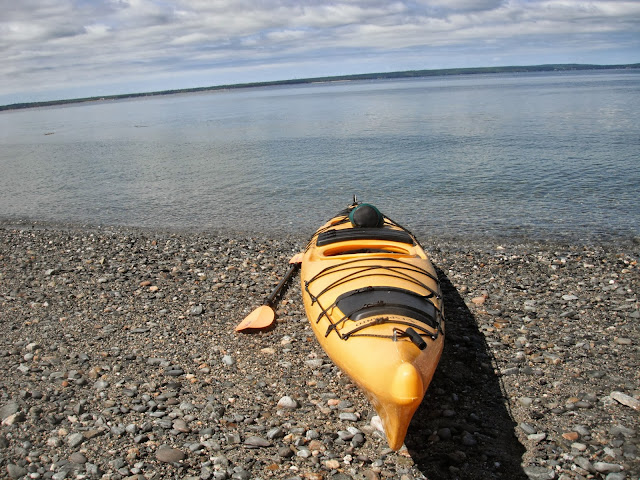
Bar Harbor: This was the end of our trip- we spent a day kayaking, where we saw seals and porpoises (they moved way too fast for me to capture) but the scenery stood nice and still.  We ended our trip with a whale watch, and I got some fantastic up-close shots of this one Humpback, Gemini, who flirted with the boat a bit.


It was a wonderful way to end an already wonderful summer.  I can't wait to get back to this beautiful state!

Thursday, September 19, 2013

Sleep Studies

As a teacher, sleep is one of my most favorite, yet fickle, things.

Indy and I moved last May in order to be closer to my school to save on gas an tolls (the tolls alone were $50 a month!) but this move also allowed me to gain a little more sleep as my commute went from 45 minutes down to 25 (20 if I manage to catch the lights right!)

Sleeping has always been one of my favorite activities.  I can remember in elementary, and sometimes even in middle school, coming home and heading to the basement to watch a t.v. show and catch an hour snooze.  Even now I feel my inner teenager.  On the weekend, if uninterrupted, I can sleep a good 12 hours.

Now that school's in session, I wake up at 5:55am.  This means I'm usually in bed by 11, and actually asleep around 11:30.  It's anywhere from 6-7 hours of sleep a night, which is okay, but for me, seemingly never enough. From Kristen over at Popcornonthestove, I found a nifty site called Sleepyti.me.  It's a bedtime calculator that will figure out when the best times are for you to fall asleep as to avoid waking up mid rem-cycle, which we all know is usually the start of a real grumpy day.  I've actually tested with two of the bed times it gives for the wake-up time of 5:55 and maybe it's just in my head, but I swear it was easier to wake up and get moving the next day.

This got me thinking a lot about my sleeping habits.  After bedtimes, I started looking up sleeping positions.

via.

I am a hard core "fetal" sleeper- part of the vast majority, apparently, so much so that Indy has woken me up many-a-night, by trying to push my knees away from his spinal cord, because that's where they end up most nights.
According to bettersleep.org,  "fetal" sleepers "have a tough exterior, but are still sensitive and may appear shy, but warm up quickly."  I find some truth in this super vague sleep-analysis-meets-horoscope.
This got me thinking about all the vivid dreams I have.  I'm one of those people who, every night, has ridiculously vivid dreams, which I remember in detail the next morning (i.e.: this post.).  Indy swears I'm a huge weirdo, and that his dreams are few and far between, and when he does dream, he never remembers them.  This got me searching around about people who have vivid dreams and I found this article, which basically explains that creative people are able to remember their dreams better than other "non-creative" people.
How 'bout them apples?  Score 1 for the Creative People!
Anyone else know any interesting "facts" about our sleeping habits?

Tuesday, September 17, 2013

Bookworms Rejoice!

During the school year it's tough for me to carve out time to read as much as I'd like.  With graduate classes and band practices and, you know, teaching all day, by the time I'm home with a few minutes to myself it's usually spent one of three ways:

a. Showering
b. Eating
c. Sleeping

I've been better about getting a few pages in just before bed in recent years, but for me, summertime is the best time to read.  I can stay up into the wee hours of the morning with a good book, or wake up late and start off my day with a chapter or two.  My newest thing has been reading my Kindle for the 30 minutes I spend on my stationary bike.  Nothing like exercising your body and your mind at the same time!

According to my goodreads account, I got through 10 books this summer.  Not shabby!  The majority of them I read on my Kindle, which I love.  Thing is, I feel like I could've read more if it didn't take me so darn long to choose new books after I finish one.  I'm notorious for finishing a book, then combing through the "People who bought this item also bought..." section on Amazon for days.  I do the same with the recommendations that GoodReads offers.

I stumbled upon this awesome site, What Should I Read Next?  And for some reason, I swear, the recommendations this site makes are so.much.better. than the other places I've looked!

I feel that when Amazon shows me what other "people who bought this item also bought," there's an agenda there- the books they recommend are always on the higher end price-wise, and, the Amazon reviewers always give away major plot points!  Boo! 

The recommendations from GoodReads are usually pretty good, only I find the GoodReads reviewers to be a way tougher crowd to please than the Amazon ones, and I'm so quickly turned off by some reviews that it takes me even more time to find something I'm interested in trying.

On What Should I Read Next?, you type in the title/author of a book you enjoyed, and they spit out a HUGE list of books they think you'd like.  When you click on the "More/Buy" button, it takes you to that book's Amazon page.  I just have to be sure I only read the synopsis, and not the reviews. 

The last book I read was Wonder by R.J. Palacio- the assigned summer reading for all of our students this year.  It's actually considered a "children's" book and was in that section of my town's library, but it's 300 pages of the most beautiful story about self acceptance, acts of kindness, and treating others as you would want to be treated.  It's such a quick read, too!  I picked it up on Friday and I finished it last night!\

Next on my list is:  Warrior Princess: My Quest to Become the First Female Maasai Warrior, by Mindy Budgor.

What was the last good book you read?  Have any suggestions?